
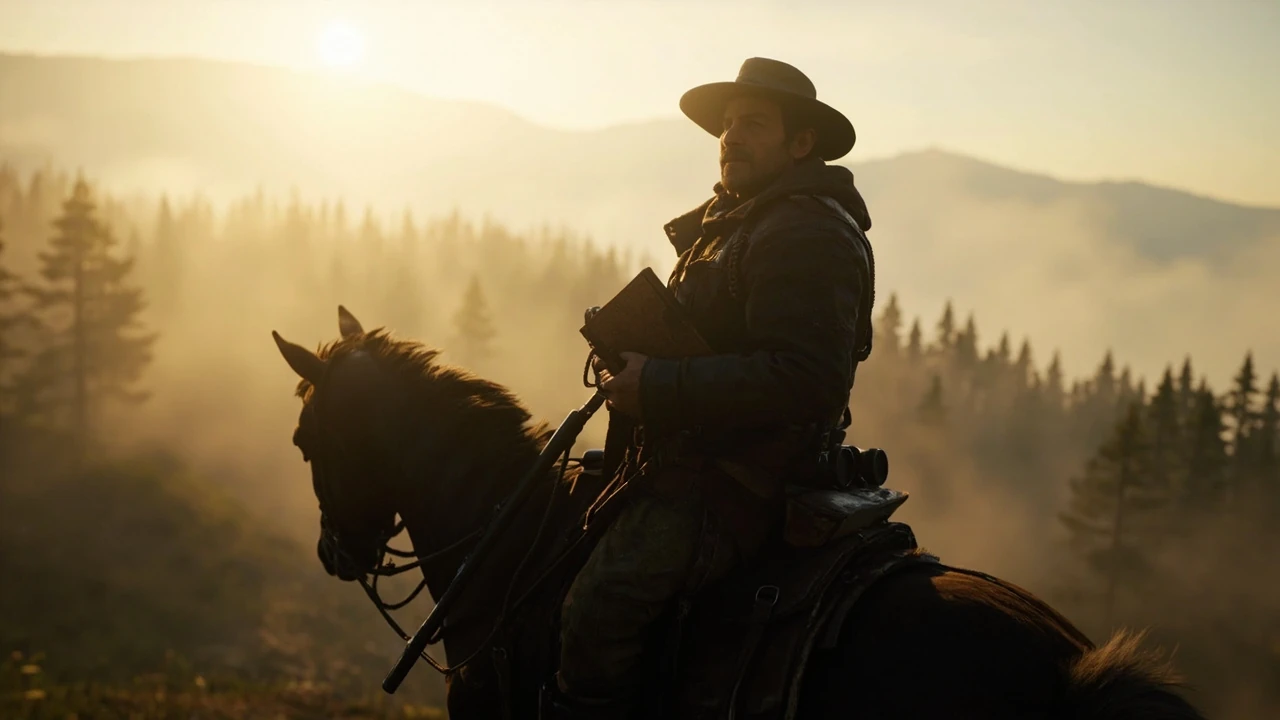
A clean legendary hunt in Red Dead Redemption 2 is decided before the trigger is pulled. The clue trail, the weapon in the wheel, the moment of the shot, and the ride back to a vendor determine whether the pelt ends up as a legendary coat or a wasted afternoon. Each hunt runs through the same small workflow: prepare the loadout, read the environment, commit only when the conditions match the in-game design, and move the pelt to a vendor in one uninterrupted trip.
The notes below cover every legendary animal rdr2 includes, plus the supporting design details that make the system work. The clue loops, spawn windows, and Trapper-and-Fence reward chain reward the same preparation habits that the rest of the game asks for, and reading the hunts through that lens is what turns a checklist into a coherent set of outings.
How legendary animals work in Red Dead Redemption 2
Legendary animals are unique, single-instance variants of the wildlife that lives in the open world. Each one has its own spawn conditions, a defined habitat, and a documented set of tools required to bring it down cleanly. Once skinned, the carcass can be carried to a Trapper for exclusive clothing recipes, and in several cases to a Fence for a unique trinket or talisman. The system looks simple from the menu and gets detailed once a clue is on the map, which is why the list is worth working through even after the main story is over.
From the player’s side, the loop has four stages. The first stage is unlocking the quest, which happens after a stranger mentions the animal or a clue appears in the world. The second stage is finding the clue, which usually requires Eagle Eye to read scent and broken foliage. The third stage is reaching the animal, which depends on following the trail without spooking it. The fourth stage is processing the result, which means skinning the carcass, loading the pelt on the horse, and riding to the right vendor. Skipping any one of the four stages turns a planned run into a restart.
The role of the legendary animal map
Once a stranger or environmental detail introduces a legendary animal, the entry shows up on the in-game map as a question mark with an animal icon. That marker is the start of the search, not the destination. The animal lives somewhere inside the highlighted region, and the only practical way to narrow it down is to ride into the region on foot and use Eagle Eye to read the trail.
Players who treat the map marker as the end point usually end up circling the area without ever finding a clue. The marker is where the search begins. The clue is where the trail begins. The animal is where the hunt actually happens.
Reading clue trails with Eagle Eye
Eagle Eye is the tracking verb that turns the world into a readable surface. When it is active, scent trails, prints, fur tufts, and disturbed foliage all light up in a desaturated color over the regular image. Legendary clues have a gold, three-star tint that distinguishes them from ordinary tracks, and that gold trail is the only reliable way to locate the animal inside the marked region.
A useful habit is to mark the start of the clue with the waypoint system, then disable the waypoint as the trail is followed. The waypoint tends to pull the camera toward the map marker, which often sits at a right angle to the actual trail. Tracking on foot keeps the player’s attention on the ground rather than on the compass, and it usually produces a shorter and cleaner approach.
Why weapon choice decides the outcome
Each legendary animal has a documented weak point and a recommended weapon class. The general rule, as documented on the Red Dead Redemption 2 Wikipedia page, is to use a rifle with high-velocity or explosive rounds for medium and large game, and a bow with improved arrows for the same target when stealth matters. A low-damage weapon produces a Poor quality carcass and strips the legendary status from the pelt. That single mistake can turn a successful chase into a wasted hour, because the legendary skin cannot be recovered once the rating drops.
Players who plan to use the Trapper should test the weapon before approaching. Standing too close to a relaxed animal and discharging a pistol usually damages the pelt and triggers a panic flee. Once a legendary animal breaks into a run, it tends to keep moving for several real-time minutes, and re-acquiring the trail after a panic run is the single most common cause of a failed hunt.
Preparing for a legendary hunt
Preparation is the difference between a clean run and a restart. The in-game economy is generous, but the time cost of a bad attempt is higher than the dollar cost of the right consumables. The list below is the minimum loadout that covers most legendary hunts in any order, and the items are easy to top up at any general store or doctor.
- Carry a rifle or a sniper rifle with regular, high-velocity, and explosive rounds selected on the weapon wheel.
- Keep a bow equipped with improved arrows for stealth approaches and a small-game arrow for birds.
- Stock at least 30 rounds of standard ammo so a missed sequence does not force a return to town.
- Use a Horse Stimulant and several Potent Snake Oil before long tracking sessions to keep stamina and Dead Eye topped up.
- Wear the Legendary Buck outfit if it is already crafted, because it improves the quality of nearby pelts and reduces the chance of a Poor result from a stray shot.
- Save the game before approaching the final area so a botched kill can be reloaded without losing the clue trail.
Players who treat legendary hunts as a sprint usually run out of consumables by the second animal. Players who treat them as a measured expedition tend to finish the entire list with a single full loadout, because most of the consumables are only used when a hunt goes wrong.
When to hunt legendary animals in the story
The earliest legendary animal, the Legendary Bear, is tied to chapter 2 events and cannot be delayed past the early story beats. The rest of the list can be approached in almost any order after the Bear is cleared, but a few animals are gated behind specific stranger encounters or story progression. A practical rule is to pick up every legendary clue before the final chapters, because several of the stranger quests close or relocate after the main story ends.
The later chapters also change law enforcement behavior in some regions, which makes stealthy approaches to deer, elk, and coyote hunts harder. Hunting the southern map animals first and leaving the snowy northern hunts for the mid-game keeps the most dangerous terrain aligned with the strongest weapons and the most practiced Dead Eye, and it lines up with the late-game cold-weather outfits that the system rewards.
How camp upgrades support hunting
The gang’s camp at Horseshoe Overlook, Clemens Point, Shady Belle, and Beaver Hollow is the logistics backbone for any extended legendary run. The provisions ledger, the leatherworking bench, and the fast-travel request from Arthur’s tent all reduce the time cost of moving pelts across the map. A camp that is well supplied with food and ammunition is the difference between a one-hour expedition and a half-day detour back to a general store.
The ledger at the camp’s central table also tracks who has been hunting and what has been donated. Donating ordinary carcasses to Pearson or to the camp stew is optional, but it keeps morale high and produces small XP bonuses that compound across a long session. Donating legendary carcasses is never required, so a player who wants to keep every pelt for crafting can ignore the ledger without losing any quest content.
The full legendary animals list, regions, and recommended weapons
There are 16 legendary animals in the base game plus the Legendary Tatanka Bison, which is a unique bounty tied to a specific stranger mission. The table below lists every entry, the region where the clue and the animal appear, and the weapon class that produces the cleanest result. Weapon choice reflects the in-game design intent and avoids relying on explosive rounds at close range, which can damage pelt quality.
| Legendary animal | Region | Recommended weapon | Notes |
|---|---|---|---|
| Legendary Bear | Grizzlies East, near O’Creagh’s Run | Rifle with high-velocity or explosive ammo | Story-tied, cannot be postponed past chapter 2 |
| Legendary Beaver | Big Valley, near the river south of Wallace Station | Rifle with high-velocity ammo | Found while following a beaver track across a road |
| Legendary Boar | Bluewater Marsh, southwest of Lakay | Rifle or bow with improved arrows | Charges on detection; aim for the head |
| Legendary Buck | Big Valley and Cumberland Forest near the Trapper | Bow with improved arrows | Combines with the Pronghorn to unlock the Legendary Buck outfit |
| Legendary Bighorn Ram | Rio Bravo, near Lake Don Julio | Rifle with high-velocity ammo | Found in rocky terrain; approach from higher ground |
| Legendary Coyote | Gaptooth Ridge, near the crossroads south of Thieves’ Landing | Rifle with high-velocity ammo | Often appears at dusk |
| Legendary Elk | Big Valley, north of the Trapper | Rifle with high-velocity ammo | Found near a stream where the water turns red |
| Legendary Fox | Scarlett Meadows, near the old fort | Bow with improved arrows or a rifle | Two specimens exist; each unlocks a unique garment |
| Legendary Giaguaro (Jaguar) | Tucla, southeast of the border | Rifle with high-velocity ammo | Aggressive; do not approach on foot without cover |
| Legendary Moose | Roanoke Ridge, near the pond east of Annesburg | Rifle with high-velocity ammo | Spawns at dawn in many saves |
| Legendary Panther | Braithwaite Manor, southeast of the house | Rifle with high-velocity ammo | Can spawn on a road; the in-game map shows a paw icon |
| Legendary Pronghorn | Rio Bravo, near the small lake | Bow with improved arrows | Combines with the Legendary Buck to unlock the outfit set |
| Legendary Ram (Mountain Goat) | Grizzlies West, near the northern pass | Rifle with high-velocity ammo | Approach from a ridge and aim for the head |
| Legendary Tatanka Bison | Hennigan’s Stead, on the plains | Rifle with high-velocity ammo | Unique bounty variant tied to a stranger mission |
| Legendary Wolf | Cumberland Forest, near the Trapper | Rifle with high-velocity ammo | Pack may be nearby; clear the area first |
| Legendary White Bison | Great Plains, southeast of Blackwater | Rifle with high-velocity ammo | Dark pelt is easy to lose; carry the satchel from the start |
The list is sorted by region rather than difficulty. Two animals share a region, and the Legendary Fox is a pair rather than a single spawn. Reading the table as a route map and tackling the map from east to west reduces travel time and keeps the highest-difficulty fights in regions where the player already has a fast horse and a stocked camp.
Reading the table as a route map
Treating the table as a route is the simplest way to convert a list of 17 entries into a three-day play plan. Start in New Hanover and the Heartlands, where the Boar, Beaver, and Fox sit within a single day’s ride. Move west into Big Valley for the Buck, Elk, and Wolf, then push north into the Grizzlies for the Bear and the Mountain Goat. Finish in the southern deserts and the bayou so the late-game snow gear is already crafted when the player reaches the coldest hunts.
This route also keeps the player inside a single fast-travel corridor for most of the list. The Heartlands, Big Valley, and the Grizzlies all share a fast-travel post that can be reached from camp without a long ride, and that post is the natural waypoint between southern and northern hunts. Crossing the map on horseback is part of the appeal of the system, but the route is much easier to plan when the table is read as a sequence rather than a checklist.
Step-by-step: running a clean legendary hunt
Once the clue map marker is active, the hunt moves through the same five stages regardless of species. The stages below are written so a player can apply them to any entry in the table and then adjust weapon and approach based on the animal’s behavior.
- Set the waypoint to the question mark on the map, then ride to the nearest road. Dismount before entering the highlighted area so the horse does not trample scent.
- Activate Eagle Eye and walk slowly until the gold three-star clue appears. Mark the location mentally, then disable the map waypoint.
- Follow the trail with Eagle Eye active in short pulses. Each pulse reveals the next few meters of trail and refreshes the bearing if the path bends.
- Equip the recommended weapon when the animal is visible. Aim for the documented weak point, usually the head or the upper chest, and fire one round.
- Skin the carcass immediately and store the legendary pelt on the horse. The satchel will not hold a legendary pelt, so the horse is the only valid storage during the mission.
If the animal flees, do not chase on horseback. Catching up on a fast horse usually places the player in front of the animal and triggers a second panic run. Wait at the last known clue, then re-activate Eagle Eye to read the new trail. The animal will loop back through familiar terrain in most cases, and the player can pick up the trail within two or three minutes.
Common failure points and how to recover
Most failed legendary hunts fall into a small set of patterns. Identifying which pattern has occurred is the first step to recovery, because the recovery action depends on the failure mode rather than the species.
| Symptom | Likely cause | First recovery action |
|---|---|---|
| Animal flees on detection at long range | Player was inside the alert radius during a sprint or shout | Stop and re-activate Eagle Eye to find the new trail |
| Pelts marked as Poor after a kill | Low-damage weapon or too many body shots | Reload the last save before the kill and switch to a rifle with high-velocity ammo |
| Clue trail disappears after a few steps | Player lost the scent line by approaching at the wrong angle | Back up 20 meters, re-orient with Eagle Eye, and walk slowly |
| Animal is not present at the clue location | Time of day does not match the spawn window | Rest at a nearby camp and return at dawn or dusk, depending on the species |
| Pelts lost on the way to a Trapper | Horse died or was swapped without a load | Respawn at a stable, retrieve the pelt from the new horse, and ride to the Trapper in one trip |
A useful diagnostic habit is to save the game immediately after a clean skin. If the next part of the journey fails, the player can reload to a state where the legendary pelt is already on the horse and the rest of the mission is purely a delivery task.
Stealth versus open confrontation
Most legendary animals can be approached in either style, but each style has a specific failure mode. Stealth with a bow keeps the alert radius small, which is useful for the smaller species like the Fox and the Coyote. Open confrontation with a rifle produces a faster kill but draws every predator in the area, including wolves, cougars, and rival hunters. The decision is usually forced by terrain: dense forest favors stealth, open plains favor the rifle, and rocky ridges favor a hybrid where the player shoots from high ground and skins before any pack arrives.
The Legendary Panther is the clearest example of a hunt that punishes the wrong style. Approaching on foot without cover usually results in a quick death, and approaching on horseback usually results in a panther that is already in motion. The cleanest pattern is to dismount at the edge of the spawn area, use Eagle Eye to read the trail, and take a single headshot from a rifle with high-velocity ammo before the animal closes the distance. The same pattern works on the Giaguaro near Tucla, where the desert terrain offers no cover for a longer fight.
Using legendary pelts: Trapper outfits and Fence trinkets
Once the legendary pelt is on the horse, the player has two destinations. The Trapper turns the pelt into outfit pieces, and the Fence turns a smaller selection into trinkets and talismans. Choosing the right destination depends on what the player needs from the system, because the two routes are not interchangeable.
Outfit pieces from the Trapper are cosmetic, but several of them have a hidden gameplay effect. The Legendary Buck outfit improves the quality of nearby pelts. The Wolf Coat improves cold resistance. The Bear Coat improves cold resistance even further and is often the first piece a player pursues, because it makes the snowy northern hunts much more forgiving.
The Fence route is the route for utility. The Legendary Wolf Heart trinket reduces the rate at which Dead Eye drains. The Legendary Bear Claw trinket increases the player’s health bar. The Legendary Buck Antler trinket improves the chance of finding higher-quality pelts in the world. These are the items that change the way the rest of the game plays, so most players pursue them before the cosmetic outfits.
- Visit a Trapper with the legendary pelt in the horse’s cargo to unlock one or more outfit recipes in the leatherworking menu.
- Visit a Fence with the same pelt to receive a unique trinket once the corresponding crafting requirement is met.
- Wear the crafted outfit before the next hunt to benefit from the hidden stats on pieces such as the Bear Coat and the Legendary Buck outfit.
- Store the trinket in the satchel slot. The effects stack with consumables, so the player can chain Dead Eye-heavy encounters for longer.
The order in which a player pursues these rewards is a personal choice, but the cleanest path is to craft at least one cold-weather outfit before the late-game northern missions. The story will send the player into snowy territory regardless of preparation, and the cold bar is a much smaller problem with the right coat equipped.
Outfit recipes and the order they unlock
The Trapper’s leatherworking menu only shows recipes for which the player has at least one required pelt. The recipes are tied to specific species, and the menu updates immediately after the player skins a legendary. A player who skins a Legendary Wolf and rides to the nearest Trapper can craft the Wolf Coat on the same visit, provided the recipe’s secondary materials are also in the satchel. The Wolf Coat’s secondary materials are a perfect wolf pelt and a perfect boar pelt, so it pays to keep a small stock of perfect pelts from ordinary hunts while chasing the legendaries.
The outfit catalog is also region-specific. The swamp Trapper near Lakay has a deeper catalog of reptile and aquatic gear, while the desert Trapper near Rio Bravo carries arid-climate outfits that are not available anywhere else. A player who wants the full catalog has to visit all three Trappers at least once, and the difference between the regional catalogs is one of the reasons the route map above recommends a circular trip rather than a single hub.
How the system compares to similar hunts in other open worlds
The closest analogue to Red Dead Redemption 2’s legendary system is the rare creature contract in The Witcher 3, where each contract asks the player to track a specific monster through a self-contained quest. The two systems share clue-based progression and a crafting payoff, but they differ in two important ways. Red Dead’s hunts are integrated into the world simulation rather than being delivered as discrete contracts, and the legendary status is permanent once acquired, which removes the reroll pressure that often dominates monster-hunt design. The result is a system that rewards the player’s preparation rather than their willingness to grind the same contract repeatedly.
The other useful comparison is the legendary predator loop in Far Cry Primal, where the player skins a rare predator and crafts a unique piece of gear from the result. Red Dead’s loop is similar in shape but deeper in execution, because the Trapper-and-Fence split forces the player to choose between cosmetic and mechanical payoff. That choice is rare in action games, and it is one of the design choices that gives the system its long-term replay value.
Trapper and Fence locations, and which to visit first
There are several Trappers and Fences across the map, but only one Trapper is the canonical crafting location for the full legendary outfit catalog, and the rest are crafting hubs for standard pelts. The table below lists the high-value vendors and the legendary content each one serves.
| Vendor | Region | Serves legendary content? | Best time to visit |
|---|---|---|---|
| Trapper near the wilderness cabin | Big Valley, west of the Trapper’s main camp | Yes, full legendary outfit catalog | After the first three legendary pelts are on the horse |
| Trapper near the swamp | Bayou Nwa, near the Lakay camp | Yes, focused on reptile and aquatic gear | After the Legendary Boar and Gar hunts |
| Trapper near the desert | Rio Bravo, south of the main road | Yes, focused on arid climate outfits | After the Legendary Coyote and Pronghorn hunts |
| Fence in Rhodes | Scarlett Meadows, near the saloon | Yes, full trinket catalog | After the first legendary trinket is unlocked |
| Fence in Saint Denis | Saint Denis, in the market district | Yes, full trinket catalog | When in town for shopping or story missions |
The two Fence locations share the same catalog, so the choice is a matter of convenience. Rhodes is closer to the central map and useful during the early-to-mid game, while Saint Denis is the better option for players who are already in town for the later story content.
Fast travel and pelt management
Fast travel from the camp request ledger does not move legendary pelts between camps. The pelt stays on whichever horse the player was riding when the legendary was skinned, and that horse must be the one ridden into the Trapper or Fence. Swapping horses at a stable before the visit will transfer the pelt to the new mount, but only if the swap happens in the same session. A good rule is to make the camp request, ride directly to the Trapper, and avoid stable stops along the way.
The legendary pelt also does not despawn when the player sleeps through several in-game days. That detail is useful for players who want to spread the legendary run across multiple sessions, because a pelt can sit on the horse for a few real-time hours while the player finishes other content. The pelt does despawn if the original horse is replaced and the new horse is sold or left behind, so the safest pattern is to keep the same horse for the entire legendary run.
Frequently asked questions
How many legendary animals are in Red Dead Redemption 2?
There are 16 legendary animals plus the Legendary Tatanka Bison, which is treated as a unique bounty rather than a standard legendary. Most guides count 16, and the Tatanka is listed separately because its clue is tied to a stranger mission rather than to the standard clue system.
What happens if I lose the legendary pelt before reaching the Trapper?
The legendary pelt is stored on the horse, and the horse is the only place it can survive a long ride. If the horse dies, the pelt transfers to a replacement horse once the player is near one. If the player loses the horse and the pelt together, the legendary is treated as gone and cannot be recovered without reloading a previous save. Saving immediately after skinning a legendary is the cleanest way to protect the reward.
Do I need the Legendary Buck outfit before hunting the other animals?
The Legendary Buck outfit improves the quality of nearby pelts, but it is not required for a legendary hunt to succeed. The outfit is a quality-of-life improvement that makes a Poor pelt less likely. Most players craft it after completing the first two or three hunts and then keep it equipped for the rest of the list.
Which legendary animal is the hardest to find?
The Legendary Moose and the Legendary White Bison are the two most common sticking points. The Moose has a narrow spawn window tied to time of day, and the Bison’s pelt is dark enough that it is easy to lose in the open plains. The Legendary Panther is the most difficult fight because of its aggressive behavior, but its location is consistent once the player approaches the right area near Braithwaite Manor.
Can legendary animals be respawned if the hunt fails?
Once a legendary animal is killed, it does not respawn, which is one of the reasons a clean hunt matters. If the player loses the legendary before skinning it, the animal does not return. If the pelt is lost in transit, the legendary is also gone. The only recovery in either case is a reload to a previous save.
Do legendary animals provide any benefit beyond crafting?
Yes. The Trapper outfits have hidden stat effects, and the Fence trinkets provide permanent bonuses. The Legendary Wolf Heart reduces Dead Eye drain, the Legendary Bear Claw increases the health bar, and the Legendary Buck Antler improves the chance of finding higher-quality pelts in the world. These are the rewards that change the way the rest of the game plays.
Is it better to use a rifle or a bow for legendary hunts?
Both can work, but the in-game design intent favors rifles with high-velocity rounds for medium to large game and bows with improved arrows for stealth approaches. The bow is quieter and does not trigger a long flee, but the rifle is more forgiving if the first shot is not perfect. The right choice depends on whether the player values a silent approach or a clean one-shot kill.
What time of day do legendary animals spawn?
Spawn windows are species-dependent. Some, like the Legendary Moose, are tied to dawn, while others are tied to dusk. The general rule is to match the time of day the player finds the clue, since the clue tends to appear close to the animal’s active period. If the trail is found in the morning, returning the next morning tends to produce a faster spawn than returning at a random time.
Can I use the Trapper and the Fence in the same visit?
Yes, and a route that combines both vendors is the most efficient use of a single ride. Most players plan a southern loop that includes the swamp Trapper, the Rhodes Fence, and the Big Valley Trapper, then a northern loop that covers the remaining Trappers and the Saint Denis Fence. The exact path depends on which animals have been hunted, but the principle is to chain vendors in a single direction rather than backtracking.
Does the legendary animal system change after the story ends?
The clue system and the spawn behavior are consistent before and after the story. Several stranger encounters close after the final chapter, so the player should complete any legendaries tied to those encounters before the story ends. Once the credits roll, the rest of the hunts behave the same as they did during the main game, which means the player can finish the list in free roam without losing any content.



Leave a Reply