
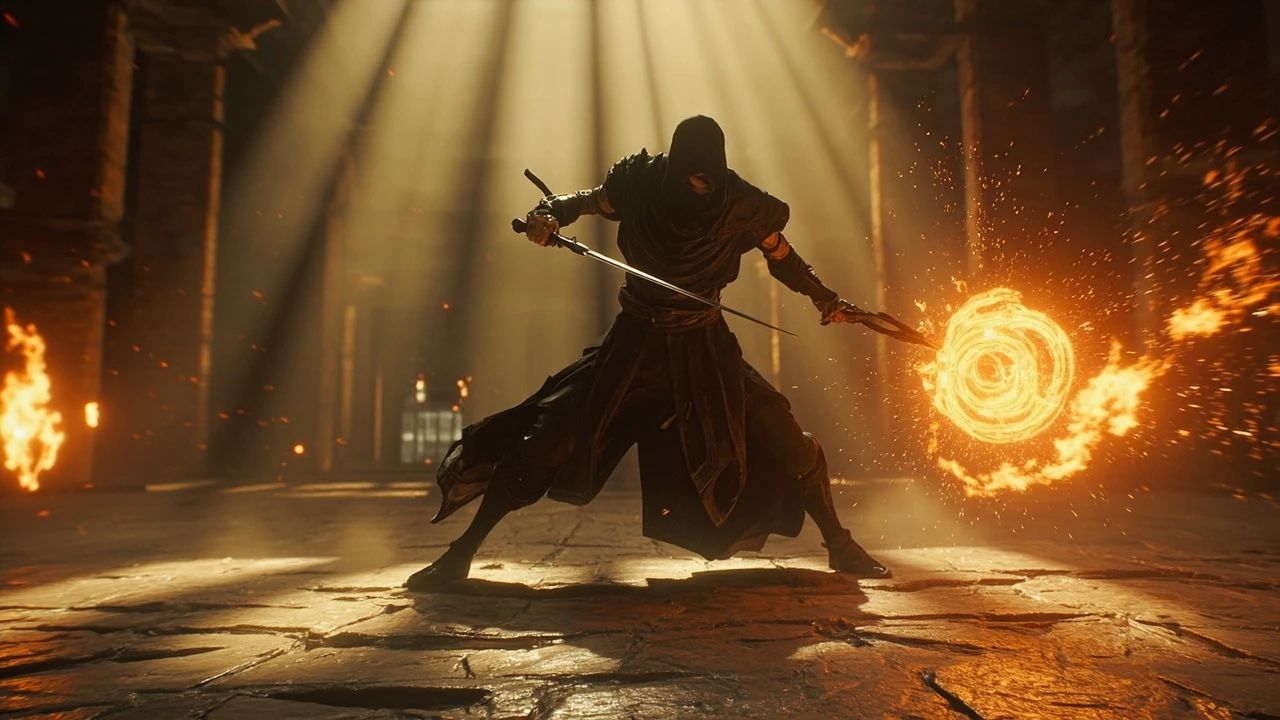
Godskin Noble: what the fight actually demands
The Godskin Noble is one of the more aggressive optional bosses in Elden Ring, and a high number of first attempts end in the second phase. He sits at the end of the Volcano Manor dungeon on Mt. Gelmir, guards a key boss weapon, and punishes the two mistakes players make most often: greedy melee trades and panic rolling at the wrong distance. The fight is built around three layers of pressure: fast rapier combos, ranged black-flame magic, and a dramatic second phase where the boss turns his own body into a weapon. Solving the encounter means understanding each layer separately before you start chaining counters together.
This guide treats the Godskin Noble as a combat design problem, not a checklist. It walks through how the encounter is structured, where the openings actually live, which stats and gear change the math, and how the second phase reshapes the spacing. The advice below leans on the moveset described in the Godskin Noble Location and Guide page on IGN and on standard Elden Ring combat design, but the recommended builds are based on the trade-offs you choose for your character rather than on a single “best” loadout.
One thing worth saying up front: this is not a fight you solve by reading a wall of text. The Godskin Noble is a feel fight, and the goal of a guide like this is to give you a model of what the boss is going to do so your muscle memory has something to attach to. Read the patterns, pick the one you keep dying to, and spend an attempt or two fixing only that pattern. The other layers will start to fall into place once the worst leak is plugged.
Where the Godskin Noble sits in Elden Ring’s combat design
The Godskin Noble belongs to a small family of humanoid sword bosses that FromSoftware uses to test a different skill than the colossal foes. Where something like Margit punishes you for being too slow, the Godskin Noble punishes you for being too predictable. He reads like a duelist: long stride, fast weapon, very few recovery frames on his bread-and-butter swings, and a ranged option that forces you to manage a second threat every few seconds. The arena is also smaller than it looks, which means a single mistimed roll can pin you against a wall during his black-flame combos.
From a development angle, the encounter is a study in layered pressure. Phase one teaches the spacing: rapier combos, a fireball cast, and a ring-of-flame ground hazard. Phase two removes the safety of those readable patterns and replaces them with body-shape attacks that change hitboxes mid-move. If you can clear phase one cleanly, the second phase stops feeling chaotic because the spacing rules are the same, even when the animations are not.
It is also worth noting that the Godskin Noble is one of two Godskin bosses in the base game, and he shares a moveset with the Godskin Apostle found in Stormveil. If you have already fought the Apostle, the rapier strings will feel familiar, but the Noble swaps the twinblade for a rapier and replaces the Apostle’s heavier holy attacks with black flame. That swap changes the math: rapier combos are faster, but black flame ticks add up in ways holy damage does not.
Why the Godskin Noble feels harder than his health bar suggests
The boss has a relatively modest HP pool for a major boss, but his damage output is front-loaded. A clean rapier combo on a mid-level character can take more than half of your health in two seconds, and the black flame applies a slow tick that ignores most flat defenses. That combination encourages passive play, which then feeds into his second-phase rolling and slam attacks. Breaking the cycle means choosing a build that lets you trade when you want to trade and back off when you want to back off, not a build that hopes to one-cycle the boss.
There is also a psychological layer. The Godskin Noble’s animations are designed to look readable until they are not, and the second phase deliberately breaks the rhythm you built in phase one. Players who try to “feel” the fight through muscle memory alone tend to die the moment that rhythm shifts. Players who built the rhythm on purpose, by counting openings and identifying tells, tend to recover within an attempt or two.
Phase one: reading the rapier and the flame
Phase one is the rehearsal. The Godskin Noble uses four recurring threats: a multi-hit rapier combo, a leaping thrust, a charged fireball, and a ring-of-flame ground AoE. Each one opens a slightly different window, and learning to read which one is coming is the real skill check. The fight rewards players who track his front hand and shoulder, not players who try to memorize exact frame counts.
Most deaths in phase one come from one of three mistakes: standing inside the ring of flame, panic rolling away from the rapier combo into the fireball, or holding block against a thrust that bypasses shields. Each of those is solved with the same tool: patience. The boss gives you a real opening after almost every sequence, and the cost of missing that opening is high enough that a defensive first cycle is almost always faster than a greedy one.
Attack-by-attack breakdown
The table below summarizes the most consistent phase-one patterns and the basic counter approach. None of the timings below should be read as frame-perfect inputs; they describe the spacing decision you are making, not the exact input you should press.
| Attack | What it looks like | How it punishes mistakes | Safe response |
|---|---|---|---|
| Rapier combo (3-5 hits) | Front foot steps forward, blade trails, then a flurry of slashes | Greedy melee trades during the wind-up, panic rolling backward into a wall | Block the first hit, roll into him on the last swing, punish the recovery |
| Leaping thrust | He crouches, then launches forward with the rapier extended | Standing still, rolling late, or blocking without stability | Roll into the thrust to your left or right at the moment of launch |
| Charged fireball | He raises one arm, black flame gathers, then a slow projectile fires | Hugging him while he charges, getting clipped by the projectile at mid-range | Close the distance during the cast, get one hit during the hand-wave animation |
| Ring of flame | He slams the ground, leaving a circular black fire on the floor | Standing inside the ring, rolling backward and getting cornered | Roll out immediately when the ring appears, never re-enter the area until the flame fades |
The single most useful habit is to treat his rapier combo as a blocking sequence. A high stability shield turns a deadly string into a manageable one and lets you watch for the end of the combo instead of guessing. Once you can reliably survive three-hit strings without panic rolling, the rest of phase one becomes a spacing puzzle.
Shield versus dodge: choosing your phase-one style
There is no single correct answer, but the choice changes how the fight feels. A block-focused setup leans on a 100 percent physical block shield, often paired with the Barricade Shield ability for stability against the longer combos. The advantage is consistency: the rapier string cannot catch you if you are patient, and you save stamina for the moments you actually need to roll. The risk is that some attacks ignore block stability, and a single bad block on a thrust can still stagger you.
A dodge-focused setup leans on medium or light rolls and i-frames. The advantage is mobility: you can reposition during the ring of flame, you never run out of stamina at the wrong moment, and you stay clear of black flame ticks. The risk is that his recovery frames are short, and a mistimed roll often lands you inside the next combo. If you choose dodge, commit to rolling into the boss rather than away. Rolling away is what feeds the second-phase wall problem.
Hybrid players can mix the two: block the rapier strings, dodge the leaping thrust, and use shield-poke only when the boss ends a combo with a long recovery. The hybrid approach costs a little stamina on every cycle, but it lowers the panic factor, because you are not committing your whole defensive layer to a single tool.
Phase two: when the boss stops acting like a swordsman
Around half health, the Godskin Noble floats into the air, charges a fiery explosion, and enters his second phase. From this point the rapier takes a back seat. The boss opens with a body-inflation attack that pushes you away, then commits to one of two new patterns: he rolls across the arena like a black-flame wheel, or he floats into the air and slams down with an explosion. Both attacks have very long recovery windows compared to phase one, which is what makes the second phase survivable once you understand the tells.
The most important change is that you no longer want to be in melee range when phase two starts. Back off, let the explosion resolve, and re-engage only after you have seen which of the two follow-up attacks he chose. The wheel rolls in a straight line and is easy to sidestep once you see the start of the spin. The floating slam is slower but hits a wider area, and the safest response is to back off rather than to roll.
One detail that often gets missed: the second-phase transition is a free punish window if you position correctly. After the boss floats up and detonates, he lands in a brief stagger before committing to the next pattern. Players who keep their distance during the explosion but close it immediately after can usually land a fully charged heavy before the wheel or the slam starts, which shortens the entire second phase by a full cycle.
Phase-two pattern map
| Pattern | Trigger | What to watch for | Opening |
|---|---|---|---|
| Body inflation push | Always the first move after the phase transition | His torso expands, black flame leaks from the seams | Back off two steps, then re-engage as the inflation ends |
| Rolling wheel | Common after the inflation if you are mid-range | He curls into a sphere and rolls along the ground | Roll to the side at the start of the spin, get a charged heavy during the long stop |
| Floating slam | Common after the inflation if you are far away | He lifts off and hovers, then crashes down with a flame burst | Back away during the float, punish the landing recovery |
| Black flame AoE | Random during phase two | Ground ignites in a small ring around him | Step out, do not chase him through the flame |
Phase two is where the fight stops being about reactions and starts being about decisions. Each pattern has a clear best response, and the boss usually telegraphs which one is coming by the distance between you. If you learn the inflation tell and the two follow-ups, the second phase becomes a series of clean trades rather than a panic.
Build choices that make the Godskin Noble easier
There is no single “best” build, but several archetypes handle the encounter more cleanly than others. The right choice depends on which mistakes you tend to make. If you die to the rapier combo, you want a block-focused build with high stability. If you die to the fireball or the ring of flame, you want mobility and ranged options. If you die to the second-phase wheel, you want a build that can punish the long recovery with a single high-damage hit.
The list below covers the most reliable archetypes for the fight. None of them require end-game gear, and most of them can be assembled on a first or second character without farming. The exact numbers in the stat table later in this guide assume a player who has reached Mt. Gelmir through normal progression, not someone farming runes in a late-game zone.
Reliable build archetypes
- Block-focused sword and board: A 100 percent physical block shield with the Barricade Shield ability, a medium or heavy thrusting sword, and medium armor. Use block for the rapier combos, roll only for the thrust and the second-phase wheel, and punish recovery frames with a single thrust.
- Dodge-focused quality build: Medium roll equipment under 70 percent equip load, a fast curved or straight sword, and a sidearm ranged option like a bow or a cheap sorcery. The build relies on rolling into the boss during the rapier recovery and kiting the second-phase patterns with spacing.
- Spell or incantation ranged build: High Intelligence or Faith, a fast ranged spell, and enough vigor to survive two stray hits. The goal is to bait the second-phase transitions, then punish the long recoveries with charged sorceries or black flame incantations.
- Summon-assisted build: A spirit ash summon plus a quality weapon. The summon draws aggro during the rapier combos, which lets you land one or two charged attacks per cycle. The trade-off is that the second-phase wheel can hit the summon hard, so you need to be ready to take over when the summon goes down.
The most common mistake when picking a build is to chase a one-shot strategy. The Godskin Noble has short recovery windows in phase one, which means even a very high damage weapon often only gets one hit per cycle. Builds that trade single hits for safety tend to clear the fight faster than builds that swing for the fences and reset after every whiff.
Stat priorities for a first-time kill
If you are meeting the boss at the recommended level for Mt. Gelmir, you do not need a min-maxed stat spread. The encounter is forgiving on stats as long as you respect the damage profile: the rapier hits hard, the black flame ticks add up, and the second-phase slam can one-shot lighter characters. Aim for enough vigor to survive two clean hits, enough endurance to block or roll through one full combo, and enough of your main damage stat to land a kill in two or three cycles per phase.
The table below shows a working baseline that fits most archetypes. Adjust the spread if your build is more specialized, but treat these numbers as the floor rather than the ceiling. The thresholds below are realistic for a player walking into the fight at the natural progression level, not for a character that has been farmed up in a late-game zone.
| Stat | Suggested minimum | Why it matters for this fight |
|---|---|---|
| Vigor | 35-40 | Survives two rapier hits and one black flame tick without dying |
| Endurance | 20-25 | Keeps stamina high enough to block a combo or roll twice in a row |
| Strength or Dexterity | Match your weapon’s scaling | Ensures your punish hits actually matter during recovery windows |
| Intelligence or Faith | 20-30 if hybrid | Supports a ranged option for the second-phase transitions |
| Mind | 20+ if caster | Keeps spell or incantation pressure on the recovery windows |
These numbers assume you are meeting the boss in the 50-70 level range that the surrounding area supports. Going significantly below that makes the fight feel unfair because you cannot survive a single mistake, and going significantly above it removes the threat of the rapier combos, which removes the point of the encounter.
How gear upgrades change the math
Stat spread is only half of the build conversation. Weapon upgrade level matters more than raw stat allocation for most melee characters, because the difference between a +6 somber weapon and a +8 somber weapon is usually larger than the difference between 40 Vigor and 45 Vigor for a fight this short. A practical rule of thumb: if your weapon is more than two upgrade tiers below the recommended floor for the area, the build is the problem, not your play.
Armor choice is more forgiving. Medium armor with a focus on poise and physical resistance is enough to keep you alive through one bad trade, and the extra poise helps with shield stability. The trap to avoid is heavy armor that pushes you over the medium roll threshold, because fat rolling against a fast rapier boss is the fastest way to lose the spacing game.
Spirit ashes and summons: how they change the fight
Spirit ashes turn the Godskin Noble from a duelist into a 2v1, and the encounter plays very differently with a summon. The rapier combos become much easier to read because the boss splits his aggression between you and the summon, and the second-phase wheel often targets the summon first, which gives you a clean punish. The trade-off is that your summon can be killed by a single black flame combo, and a dead summon leaves you alone for the rest of the fight.
Pick summons that can draw aggro without dying in two hits. Tanky humanoid ashes that hold a shield tend to do better than glass-cannon ashes that rely on burst damage, because the boss’s hardest hits punish squishier summons. If you plan to use a summon, budget for the FP cost and treat the summon as a tool that absorbs two or three of the boss’s heaviest moves, not as a damage source.
Cooperative summons work as well, and the boss room is set up for them. Two players tend to split the boss’s aggression, which makes the rapier strings easier to read because the boss has to choose a target. The risk is friendly fire during the ring of flame, and over-aggression from a summon-happy partner who keeps pulling the boss into bad positions. Talk through the phase-two plan before the fog gate if you are playing with a stranger.
Common summon mistakes
- Summoning too early: If you summon before the boss is aggroed, the summon may wander off and waste aggro on the wrong target.
- Summoning too late: Summoning mid-combo breaks your spacing and the summon often dies before it can help.
- Ignoring summon positioning: If you and the summon are both in melee range, the boss will split his combos and you will both take chip damage that adds up to a death.
- Over-relying on the summon: If the summon dies, you should already know how to handle the second phase on your own. Treat the summon as a safety net, not a crutch.
Pre-fight checklist: what to do before you enter the fog
The Godskin Noble is one of those bosses where a minute of preparation saves several attempts. Before you walk through the fog gate, run through the short list below. It is not a ritual; it is a way to remove the small mistakes that turn a clean attempt into a wasted one.
Pre-fight essentials
- Confirm your weapon is upgraded: A +6 to +8 somber weapon or a +12 to +14 standard weapon is the practical floor. Below that, the fight will last long enough that you run out of healing items.
- Bring a 100 percent physical block shield if you plan to block: Anything below that will chip damage you to death during a long combo.
- Restock healing and FP consumables: Bring at least six healing items and enough FP to cast your spells or incantations two or three times.
- Remove heavy armor penalties: If your equip load pushes you over the medium roll threshold, swap to lighter gear. Fat rolling is the most common cause of failed dodges against the rapier combos.
- Clear nearby adds before engaging: The hallway leading to the boss room usually has one or two wandering enemies. Clear them so the boss fight is a 1v1, not a 1v3.
- Buff if you have the FP: A weapon buff, a body buff, or a drawn-out consumable adds up to a faster phase one and a safer phase two.
- Note the boss room layout: The arena is small and the walls matter. Identify the long edge you want to use for the second-phase wheel, so you are not cornered when it starts.
Common failure modes and how to fix them
Most Godskin Noble deaths fall into a small set of patterns. If you can identify which pattern you are dying to, you can fix it in a single attempt rather than grinding out the fight through brute force. The list below is organized by symptom rather than by attack, because the symptom is what you actually notice during a death recap.
Failure patterns and fixes
- Dying to the rapier combo while blocking: Your shield stability is too low. Switch to a higher stability shield, equip the Barricade Shield ability, or stop blocking the longer combos and roll instead.
- Dying to the second-phase wheel: You are panicking and rolling backward. Roll to the side at the start of the spin and punish the long stop. The wheel does almost no damage to anyone who is not directly in its path.
- Dying to the second-phase slam: You are trying to roll the slam. Back off instead. The slam has a generous hitbox, and rolling is less reliable than simply creating distance during the float.
- Dying to the fireball: You are at mid-range when he casts it. Close the distance during the cast and punish the hand-wave animation, or stay at long range and sidestep the projectile.
- Dying to the ring of flame: You are chasing him into the AoE. Treat the ring as a wall, not a hazard. Step out and wait for the flame to fade before re-engaging.
- Running out of healing items: The fight is lasting too long. Either your weapon is under-upgraded or you are not converting recovery windows into punish hits. Check both before adjusting the rest of your build.
Each of these fixes assumes the rest of your build is reasonable. If you are dying to two or more of these patterns at once, the more useful fix is to lower the boss’s damage by adjusting your build rather than to memorize more counters.
What the Godskin Noble teaches about Elden Ring combat
From a design perspective, the Godskin Noble is a teaching boss. He introduces two of the most important combat lessons in Elden Ring in a single encounter: the value of spacing during fast humanoid fights, and the way second phases change the rules instead of just raising the damage. Many later bosses use the same template, and players who internalize the lessons here tend to have a much smoother time with the duelist-style encounters in the late game.
The encounter also illustrates how Elden Ring handles layered pressure. The Godskin Noble does not need a single overwhelming attack because he combines several mid-threat attacks into a sequence that feels overwhelming. That design choice rewards players who break the fight into layers: rapier, fireball, ring, then phase transition. Players who try to solve the whole fight at once usually end up guessing.
How the design generalizes
The same layered-pressure pattern shows up in several other Elden Ring duelist fights. The trick is always the same: identify the layer that killed you, learn its counter, and only then move on to the next layer. Trying to learn the whole moveset at once is what turns these fights into walls.
It also explains why some players bounce off the Godskin Noble but clear Stormveil without trouble, and vice versa. The duelist template rewards a specific kind of attention, and that attention is not the same one that makes the larger, slower bosses feel easy. Working through the Noble is one of the cheaper ways to train that attention before the late-game duelist checks, which tend to be much less forgiving.
Internal reading: where to go next
Two pieces of context from earlier coverage fit this guide. The Mass Effect 3 romance options piece is an example of how we treat layered character systems as a series of small decisions rather than a single big one, which is the same framing that makes this fight feel manageable. The legendary animals in Red Dead Redemption 2 guide applies a similar principle to a different genre: hunt one pattern at a time, build a kit that fits the encounter, and stop trying to brute-force the whole checklist in a single attempt.
Frequently asked questions
Where do I find the Godskin Noble in Elden Ring?
The Godskin Noble is the first major boss of the Volcano Manor dungeon on Mt. Gelmir, located at the Temple of Eiglay Site of Grace, roughly halfway through the Legacy Dungeon.
Is the Godskin Noble required to progress the main story?
No. He is an optional boss inside a Legacy Dungeon, but he guards a key boss weapon and clearing the room is a common stepping stone for players pushing through the Volcano Manor questline.
What is the best shield to use against the Godskin Noble?
A 100 percent physical block shield is the most reliable choice, ideally one with the Barricade Shield ability for stability against the longer rapier combos. A medium shield with good stability also works if you prefer faster mobility.
How do I dodge the second-phase rolling attack?
Roll to the side at the moment the boss curls into a sphere. The wheel travels in a fairly straight line, so lateral movement is the safest counter. Once the wheel stops, you have a long window to punish the recovery.
What level should I be to fight the Godskin Noble?
Most players are between 50 and 70 when they reach Mt. Gelmir. That range gives you enough vigor to survive two clean hits and enough damage stat output to clear each phase in two or three safe cycles.
Can I summon other players for the Godskin Noble?
Yes, the boss room allows cooperative summons. Two players tend to split the boss’s aggression, which makes the rapier combos easier to read and the second-phase patterns easier to bait.
Does the Godskin Noble’s black flame do extra damage over time?
Yes, the black flame applies a damage-over-time effect that ignores most flat defenses. If you are hit, remove the DoT quickly with a healing item rather than waiting for the next opening.
What is the reward for beating the Godskin Noble?
The boss drops a key weapon and a large sum of runes on a first kill. The exact item depends on the patch, but the encounter is always worth clearing for the gear and the rite.
Should I use a spirit ash against the Godskin Noble?
A tanky spirit ash that can hold aggro is a strong choice, especially for players who struggle with the rapier combos. The trade-off is that the second-phase wheel can kill a squishy summon quickly, so pick something with enough health to survive two or three heavy hits.
What changes the most in the second phase of the Godskin Noble?
The boss stops relying on the rapier and switches to body-shape attacks: a wheel roll and a floating slam. The damage windows get longer, but the spacing rules stay the same, so learning the second phase is mostly about identifying which of the two follow-up patterns he is about to use.


Leave a Reply