
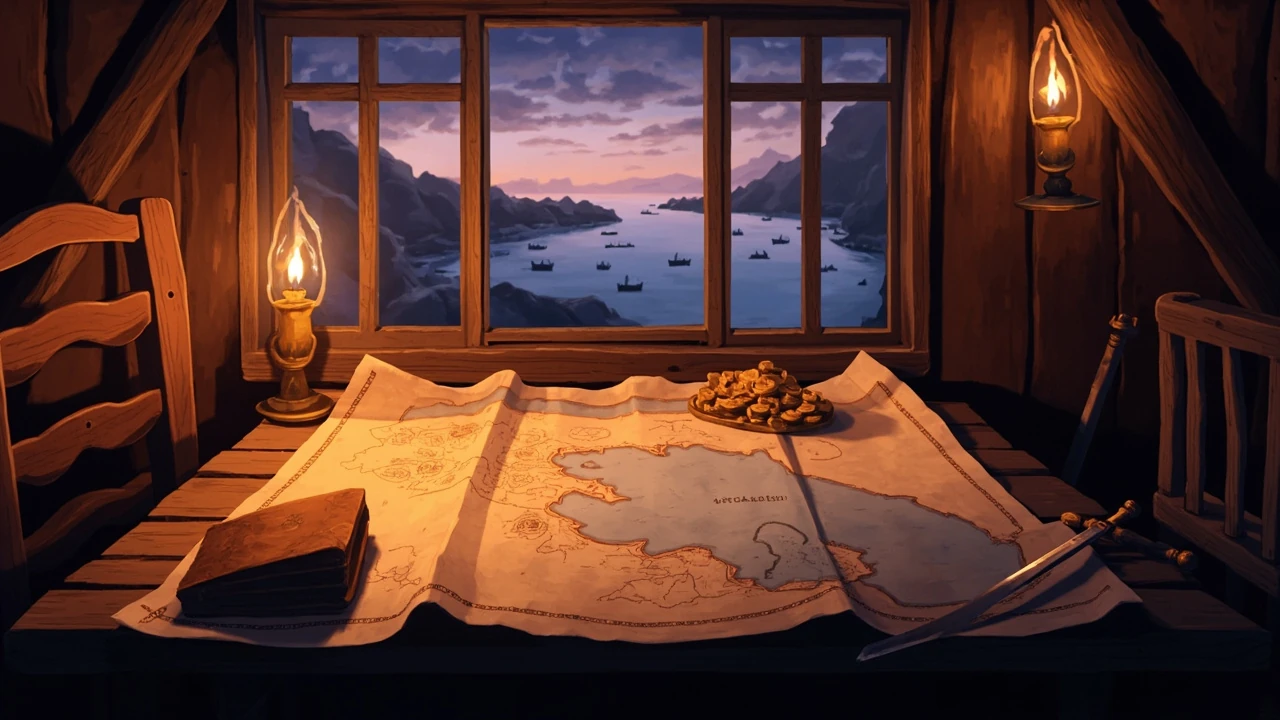
Octopath Traveler 0 is a prequel to the original Octopath Traveler series, set in an earlier chapter of Orsterra where the player builds a town, gathers travelling companions, and learns how the eight-path system that defined the franchise first took shape. Because the game spreads its content across many short chapters and routes rather than one linear road, an octopath traveler 0 walkthrough needs to be organised by story beat and progression decision rather than by a single dungeon path. The goal of this guide is to give a reliable order of operations, a clear picture of what each chapter asks you to do, and an honest look at the combat, job, and town-building systems so you can decide how to spend your time and resources.
This walkthrough is written for first-time players on the mobile and PC versions released in late 2025 and 2026. It assumes you have access to the standard edition’s main story chapters and not a regional or limited event variant. When the game has been updated since launch in a way that affects an early-game chapter, the change is flagged with the patch context so you can confirm it in your own version.
Octopath Traveler 0 walkthrough: where to start and what to expect
When you begin Octopath Traveler 0, the game places you in a small coastal town that has seen better days. The first ten to fifteen minutes are deliberately quiet: a short scripted scene, a quick tour of the inn, and an early conversation that introduces the ring system the entire game uses to recruit travelling companions. Treat that section as an extended tutorial. Read each ring tutorial pop-up, equip the starter weapons you are given, and let the auto-save trigger at the inn before you do anything else.
The game does not gate progress behind a single hard boss at the start. Instead, the early hours ask you to complete a handful of short story chapters for your original protagonist, then unlock the ability to invite the first of the eight pathbearers. Each pathbearer is a named NPC with their own mini-chapter and their own fighting style. The walkthrough below uses that structure: it treats the early town-building loop as chapter 0, then walks through the first three pathbearer chapters in the order most players find efficient, then covers the mid-game loop that ties the eight stories together.
Your first thirty minutes in town
During the opening segment of the octopath traveler 0 walkthrough, your only real jobs are to learn the UI, meet the starter NPCs, and accept the first three or four town requests from the bulletin board. These requests ask for simple tasks such as delivering a letter, clearing a small dungeon of three to five enemies, or gathering crafting materials from a nearby node. Completing them gives you the first building materials used to upgrade the inn.
The inn is the hub of the game. Upgrading it unlocks new facilities, raises your maximum party size, and unlocks the tavern where pathbearers eventually wait. Most of your first hour is spent rotating between the bulletin board, the crafting bench, and the local dungeon. There is no penalty for taking the requests in any order, and you can abandon a request and pick another if the recommended level feels too high.
Understanding the ring system and pathbearers
The ring system is the single most important mechanic for any octopath traveler 0 walkthrough. Each pathbearer carries a ring tied to one of the eight traditional Octopath Traveler jobs. When you recruit a pathbearer, you unlock that job for your own protagonist and gain access to that pathbearer’s chapter content. The ring is not just a job unlock: it is also a key item that can be equipped in the tavern to grant passive bonuses such as higher critical rate, cheaper shop prices, or a small boost to crafting success.
Recruitment is not automatic. Each pathbearer has a short personal chapter, and you must clear that chapter before the pathbearer agrees to stay in your town. Some chapters also require your town to have reached a specific upgrade tier. The walkthrough accounts for this by grouping pathbearers into tiers: those available after chapter 1, those available after chapter 3, and those available after the mid-game story milestone.
What a pathbearer chapter actually contains
Pathbearer chapters in Octopath Traveler 0 are short, focused, and self-contained. Each one has two scripted scenes, a small dungeon with three to six fights, a boss, and a reward chest. A typical chapter takes twenty to forty minutes. The chapters are designed so that the pathbearer’s job and the boss’s weakness line up, so the chapter also doubles as a tutorial for that job. For example, the first Hunter pathbearer chapter features a boss weak to bows and axes, which lines up with the Hunter’s main weapon types.
Because each chapter teaches a job while serving as part of the broader story, the walkthrough does not skip them. The order below is the order in which most players see the cleanest difficulty curve, not the chronological order of the in-game calendar.
Chapter order for the first playthrough
Below is the recommended chapter order for a first playthrough of Octopath Traveler 0. The order is chosen so that each new job you unlock is useful for the next boss, and so that the town unlocks triggered by one chapter are active when the next chapter asks for them. If you prefer story order over mechanical efficiency, you can follow the in-game suggested path instead. The walkthrough still works either way.
- Chapter 0: The town and the first ring (prologue and tutorial).
- Pathbearer chapter: the Hunter (unlocks bows and axes, the first ranged job).
- Pathbearer chapter: the Cleric (unlocks staves and healing, the first support job).
- Pathbearer chapter: the Scholar (unlocks ice and light magic, the first caster job).
- Chapter 1: The first major story event and the pathbearer council.
- Pathbearer chapter: the Warrior, the Merchant, the Dancer, and the Apothecary in any order, depending on which weakness you want to cover first.
- Chapter 2: The mid-game story milestone and the eight-ring convergence.
- Final chapter content and the true ending flags.
Each of these chapters is covered in more detail below. Bosses are called out by name, weaknesses are listed, and the recommended party is given so you can prepare before walking into the dungeon.
Chapter 0: rebuilding the town
Chapter 0 is not a single dungeon. It is the prologue chapter that asks you to bring the town back to working order. The chapter has three parts: a small field dungeon, a crafting sequence, and a scripted scene at the inn. The boss is the field dungeon’s last room, a simple fight that introduces the break and boost system used for the rest of the game.
The prologue boss is weak to swords and spears. If you have not yet recruited a pathbearer, your starting protagonist with the sword is enough to clear it. Use a boost on the first turn to break the boss’s shield, then chain regular attacks until the boss is down. Save your SP for the second half of the fight when the boss starts using an area attack that can hit your back row.
Once the boss is defeated, return to the town and use the dropped materials to upgrade the inn to tier 1. The tier 1 inn unlocks the bulletin board’s second tier of requests, the crafting bench’s second tier of recipes, and the first slot for a pathbearer to stay in the tavern. After the upgrade is complete, the next story beat triggers automatically and the game marks chapter 0 as finished.
Town requests during chapter 0
The bulletin board during chapter 0 has between six and ten requests available at any time. The walkthrough treats the requests as optional but strongly recommended: each completed request contributes to the inn’s upgrade progress even if the materials you gather are not directly used in the recipe. The fastest way to clear the chapter 0 requests is to focus on the ones that ask for materials you would already gather while walking the field dungeon.
- Delivery requests: usually one or two at any time, never combat, and they always end at an NPC who can be reached without entering a dungeon. The walkthrough treats these as a five-minute detour and a reliable source of crafting materials.
- Dungeon requests: usually two or three at any time, each tied to a specific small dungeon. The rewards are slightly better than delivery requests, and clearing the dungeon for the request also clears the prologue field dungeon, which lets you do both in one run.
- Crafting requests: these ask for a specific item from the crafting bench. Because the bench can be expensive to use on tier 1, the walkthrough recommends picking the requests that use materials you have already gathered and skipping the ones that ask for new recipes until the bench reaches tier 2.
Pathbearer chapter: the Hunter
The Hunter is the first pathbearer most players meet because the Hunter’s ring is awarded as a reward for the chapter 0 boss. The Hunter’s chapter takes place in a forested area east of the starting town, and the chapter asks you to track a wounded animal, solve a short puzzle about which path it took, and clear a small dungeon before the boss appears.
The Hunter is a ranged job that uses bows and axes. Bows hit single targets from a distance and can hit flying enemies. Axes hit multiple targets at once, which makes them useful when the chapter dungeon spawns groups of three or more. The Hunter’s support skill is a mark that increases the damage the marked target takes from the next attack. The mark does not stack with itself, so the walkthrough recommends applying it before the heaviest single-target attack in the round.
The Hunter chapter boss is a large beast that starts the fight with a shield weak to bows. After the shield is broken, the boss summons two adds that are weak to axes. The cleanest opening is to break the boss with a boosted bow attack, kill the adds with axe area attacks, then finish the boss with regular bow attacks. The fight has one scripted add phase at 50 percent health. Save a single SP for the add phase so you can boost the axe area attack and clear the adds in a single round.
| Slot | Job | Main weapon | Role in the Hunter boss fight |
|---|---|---|---|
| Front row 1 | Protagonist (Sword) | Sword | Lead break with a boosted sword attack on the first turn, then chip damage. |
| Front row 2 | Hunter (once recruited) | Bow | Apply the mark, then cycle bow attacks to keep the boss broken. |
| Back row 1 | Cleric (once recruited) | Staff | Heal and clear debuffs. Heal only when below 60 percent to keep SP for emergencies. |
| Back row 2 | Protagonist (apprentice role) | Axe or spear | Swap into the Hunter slot after recruitment to clear adds with area attacks. |
After the Hunter chapter, the Hunter becomes a permanent companion in the tavern and the Hunter job is unlocked for the protagonist. The walkthrough recommends that you switch the protagonist into the Hunter slot before the next chapter so the party has at least one dedicated ranged attacker.
Pathbearer chapter: the Cleric
The Cleric pathbearer is the second chapter on the walkthrough. The Cleric’s chapter is a short rescue mission in a chapel just north of the town. The Cleric’s job uses staves and light magic, and the chapter is a soft tutorial for the healing and buff role. The dungeon has three fights and a boss that uses a poison debuff. Bring at least one antidote to the chapter, which the walkthrough picks up at the apothecary stall in the town square before leaving.
The Cleric chapter boss is weak to light magic and to staff strikes. The boss opens with a single-target debuff that drops the target’s attack for three turns, then a group heal that does not actually heal the boss. The cleanest opening is to break the boss with a boosted staff attack, then apply light magic while the shield is down. The boss’s poison can be removed with a single antidote or a Cleric cleanse. Because the Cleric is recruited only after the fight, plan the cure around your protagonist’s support skill rather than the new job.
- Recommended level range: 7 to 9 for a first playthrough.
- Recommended party: protagonist as Hunter, protagonist as Cleric (apprentice), a hired NPC sword user, and the Hunter as backup DPS.
- Recommended items: two antidotes, one revive item, one healing grape for the boss phase at 30 percent health.
Pathbearer chapter: the Scholar
The Scholar pathbearer is the third chapter on the walkthrough. The Scholar is the first dedicated caster in the game, with access to ice and light magic. The Scholar’s chapter takes place in a small library dungeon where the player must solve a simple puzzle to open the boss room. The puzzle is a sliding-tile arrangement that places four books on a shelf in the order the librarian NPC describes. The walkthrough recommends taking a screenshot of the librarian’s dialogue and using it as a reference, because the order changes slightly if you reload from the last save.
The Scholar’s boss is a flying enemy that is immune to physical attacks until its shield is broken. The shield is weak to ice magic. The cleanest opening is to apply a boosted ice spell on the first turn, then cycle light magic for damage while the shield is on cooldown. Because the boss is flying, bows are not the right answer for this fight even though the Hunter can usually hit flying enemies. The Scholar’s spells are the only reliable break here.
| Phase | Boss action | Recommended response |
|---|---|---|
| Phase 1 (100-70%) | Cast a single-target ice spell that hits the front row | Boost a Cleric staff attack to break the shield, then cast ice and light on the boss |
| Phase 2 (70-30%) | Summon two adds and a barrier that absorbs the next magic attack | Use a physical attack to remove the barrier, then clear the adds with axe area attacks, then resume magic |
| Phase 3 (30-0%) | Cast a full-party ice spell that can KO the back row | Pre-emptively heal, use a revive item if a back-row member goes down, then burst the boss with a boosted ice spell |
After the Scholar chapter, the Scholar job is unlocked for the protagonist. From this point on, the walkthrough treats the Scholar as the default caster slot. Ice magic is also the most reliable way to break shields in the mid-game dungeons, so the Scholar stays relevant for the rest of the run.
Chapter 1: the first major story event
Chapter 1 begins automatically once the Hunter, Cleric, and Scholar pathbearers are in the tavern. The story asks the player to host a small council at the inn, hear each pathbearer’s request, and choose a single project to fund with the town’s limited resources. The walkthrough treats this as a soft decision: the project you fund does not lock out the other projects, but it does change the order in which the next four pathbearer chapters unlock.
The walkthrough recommends funding the road project first. The road project upgrades the inn’s entrance and unlocks fast travel between the four starting zones. Fast travel saves real time in the next four chapters, because each of those chapters has its own small field area and going back to the inn on foot otherwise eats ten to fifteen minutes per round trip.
Town management during chapter 1
Once fast travel is unlocked, the walkthrough recommends a specific town upgrade path:
- Upgrade the inn to tier 2 as soon as the road project is complete. Tier 2 unlocks a second tavern slot and a small shop.
- Upgrade the crafting bench to tier 2 as soon as the inn reaches tier 2. Tier 2 unlocks the recipes used by the next four pathbearer chapters.
- Upgrade the bulletin board to tier 2 last. Tier 2 requests give better rewards but are also more expensive, so it makes sense to delay the upgrade until the bench is producing tier 2 items.
This order keeps the town’s economy in balance. A common mistake is to over-invest in the bulletin board and run out of materials for the crafting bench, which then blocks the recipes needed for the next pathbearer chapter.
Pathbearer chapters: Warrior, Merchant, Dancer, Apothecary
After chapter 1, the remaining four starting pathbearers are available. The walkthrough covers them in the order Warrior, Merchant, Dancer, Apothecary. That order is chosen so that the Warrior covers physical tanking, the Merchant covers money, the Dancer covers buff utility, and the Apothecary covers debuff and poison handling. Each chapter is short and follows the same template as the first three: two scenes, three to six fights, a boss, and a reward chest.
Warrior pathbearer chapter
The Warrior chapter is a short escort mission in a mountain pass. The Warrior uses swords and spears and the job’s main feature is a counter skill that returns a portion of incoming damage. The chapter boss is a large humanoid that opens with a physical shield. The cleanest opening is to break the shield with a boosted spear attack, then cycle sword attacks to keep the boss broken. Save a single SP for the boss’s 50 percent phase, when the boss summons an add that uses a multi-hit area attack. The counter skill absorbs one hit and returns damage, so use it during the add phase rather than during the regular phase.
Merchant pathbearer chapter
The Merchant chapter takes place in a small trading post and is one of the easier pathbearer chapters. The Merchant uses daggers and the job’s main feature is a haggling skill that gives bonus gold and a small discount at shops. The chapter boss is a thief NPC that is weak to daggers. The walkthrough recommends using the Merchant’s summon skill to add an extra damage source on the first turn, then finishing the fight with regular dagger attacks. The reward chest for this chapter contains the materials for the crafting bench’s first tier 2 recipe, which makes the Merchant chapter a soft prerequisite for the next two chapters.
Dancer pathbearer chapter
The Dancer chapter is set in a theatre and is the first chapter that tests buff management. The Dancer uses fans and the job’s main feature is a dance that buffs the party’s evasion and attack for three turns. The chapter boss uses a script that begins with a debuff that lowers evasion. The walkthrough recommends using the Dancer’s dance on the second turn, after the debuff has been applied, so the buff lands on a clean slate and the evasion loss is partially offset.
Apothecary pathbearer chapter
The Apothecary chapter is the last of the starting four. The Apothecary uses knives and the job’s main feature is a concoction skill that deals damage over time and reduces the target’s attack. The chapter boss is a poison-themed enemy that is weak to the Apothecary’s concoction. The cleanest opening is to apply a boosted concoction on the first turn, then cycle physical attacks while the poison ticks. Save a single antidote for the boss’s 30 percent phase, when the boss reflects a portion of the poison back to the party.
Chapter 2: the mid-game story milestone and the eight-ring convergence
Chapter 2 begins once the eighth starting pathbearer is in the tavern. The story moves the player to a new region, unlocks a second town hub, and asks the player to choose which of the eight rings will be used to seal a story-critical object. The walkthrough treats this as a soft decision: any ring works, and the choice affects only the dialogue and the reward, not the boss’s difficulty.
The chapter 2 boss is the first true wall for most players. The boss has two phases, four adds, and a scripted invulnerability window. The walkthrough recommends the following approach:
- Phase 1 (100-60%): the boss is weak to spears and ice. Open with a boosted spear attack to break the shield, then chain ice spells. The boss summons two adds at 80 percent health. Clear the adds with axe area attacks before resuming damage on the boss.
- Phase 2 (60-30%): the boss becomes immune to physical damage and is weak only to light magic. Switch the protagonist into the Scholar slot and rotate light spells. The Cleric should be on standby to cleanse the debuff the boss applies at the start of this phase.
- Phase 3 (30-0%): the boss is invulnerable for one turn, then vulnerable for two. Use the invulnerable turn to apply a Dancer buff and a Merchant summon, then burst the boss with a boosted light spell on the second turn.
After the chapter 2 boss, the second town hub unlocks. The walkthrough recommends upgrading the second inn to tier 2 immediately, because the next story content requires the second inn to be functional before the pathbearer can return from the post-boss scene.
Late-game content and the true ending flags
Once chapter 2 is complete, the game opens the late-game loop. There are two additional pathbearer chapters, several side dungeons, and a true ending chapter that is gated behind a specific set of choices made across the pathbearer chapters. The walkthrough treats the true ending flags as follows:
- Choose the road project in chapter 1. This unlocks the late-game fast travel between the second town and the post-game dungeon.
- Use the Hunter’s ring to seal the story-critical object in chapter 2. This unlocks the Hunter’s true ending scene.
- Clear the Apothecary chapter’s hidden request after the boss. The hidden request asks the player to return to the trading post and craft a specific antidote. Completing it unlocks the Apothecary’s true ending scene.
- Do not spend the materials for the bench’s tier 3 recipe until after the true ending flag is triggered. The recipe is used in the post-game dungeon, but it is also used in the path that locks the Apothecary’s true ending if the materials are spent early.
The true ending chapter is a single scripted scene followed by a single boss. The boss is weak to all eight of the pathbearer jobs, so the cleanest approach is to bring one representative of each job and rotate the boost. The boss has a one-shot attack at 20 percent health, so keep the Cleric’s revive item ready for that turn.
Combat fundamentals worth keeping in mind
Even with a good chapter order, Octopath Traveler 0 has a few combat rules that are easy to miss. The walkthrough treats them as a short reference so you do not have to relearn them every chapter.
- Break and boost: each turn, a character can either break an enemy’s shield with the right weapon or spell, or boost their own attack for that turn. Boosted attacks do not stack, so a single boost is the right default.
- SP economy: SP is shared across all jobs in the current rotation. A character who is swapped out keeps their SP, but a character who uses a job’s ultimate skill spends SP even if the skill misses.
- Job switching: the protagonist can change job at any save point. Changing job does not restore HP or SP, so swap before a boss if you need a specific passive skill, not after.
- Add management: a phase that summons adds is almost always easier to clear the adds first and then return to the boss. Adds that stay alive past the boss’s next phase get stronger.
- Item priority: antidote, revive, and healing grape are the three items that should never be sold. Everything else is fair game once your inventory is full.
Common early-game mistakes to avoid
The walkthrough also flags a few patterns that first-time players run into during the first five hours. None of them will hard-block your progress, but each one can cost you a chapter of efficiency if you do not catch it early.
- Spending crafting materials on the bench’s tier 1 recipes instead of saving for tier 2. The tier 1 recipes give a small bonus that is replaced by the tier 2 recipes within a chapter or two.
- Recruiting the pathbearers in the order they appear in the tavern rather than the order on the walkthrough. The tavern does not reset the order, so the first pathbearer you talk to is the one you will see first, and the rest of the order shifts accordingly.
- Selling the Hunter’s ring after recruiting the Hunter. The ring is also a key item used in chapter 2, and selling it blocks the Hunter’s true ending scene.
- Skipping the bulletin board requests in chapter 0. The requests give the materials that unlock the inn’s tier 1 upgrade, and the inn’s tier 1 upgrade is the gate for the rest of the game.
- Forgetting to equip the pathbearer’s ring in the tavern. The ring’s passive bonus only applies while the ring is equipped. The walkthrough treats the ring as the first thing to check before any chapter.
What to do if you fall behind the recommended level
Because the chapter order in this octopath traveler 0 walkthrough is built around a specific difficulty curve, it is possible to fall a level or two behind if you skip the optional requests or if you lose a fight and respawn. The walkthrough treats a one-level gap as a non-issue: most early bosses are designed to be cleared at the recommended level minus one. A two-level gap is still recoverable with the right items. A three-level gap usually means the chapter has changed the recommended level since the last patch, or the player is approaching the boss with the wrong party.
The fastest way to catch up is to clear the bulletin board requests in the current town. Each request gives a small XP reward and a small crafting reward. Two or three requests are usually enough to close a one-level gap. If the gap is wider, the walkthrough recommends a short run of the field dungeon that hosts the next pathbearer’s chapter. The field dungeon’s enemies respawn quickly, and the XP curve is tuned to close a two-level gap in twenty to thirty minutes.
How patches and updates can change the walkthrough
Octopath Traveler 0 has received at least one balance patch since launch, and the walkthrough above reflects the most recent confirmed changes. The two areas most likely to change in future patches are the chapter 2 boss’s phase 2 immunity list and the bench’s tier 3 recipe cost. If you are following the walkthrough on a version that predates the most recent patch, expect a small difficulty drop on the chapter 2 boss and a small cost reduction on the tier 3 recipe. If you are following it on a version that post-dates the patch, the walkthrough still works, but the recommended level for chapter 1 may be one level higher than the listed range.
For context on how the Octopath Traveler series has been positioned by its publisher and how the prequel fits into the wider catalogue, the Octopath Traveler series overview on Wikipedia is a useful reference. The prequel shares a name and a visual style with the earlier games, but the town-building loop and the ring system are new to this entry, so treat the earlier games as a tonal reference rather than a mechanical one.
For a sense of how the mobile launch of an earlier prequel in the franchise was handled and how regional releases differ from the global version, the TouchArcade coverage of the Champions of the Continent release is a useful comparison. The Octopath Traveler 0 launch followed a similar pattern of a Japan-first mobile release, then a global release on mobile and PC.
Quick reference: party and items by chapter
The table below condenses the recommended party and the items you should bring into each chapter. It is meant to be a quick reference once you are already familiar with the chapter’s boss. The first time you enter a chapter, the walkthrough above is the better source.
| Chapter | Front row 1 | Front row 2 | Back row 1 | Back row 2 | Key items |
|---|---|---|---|---|---|
| Chapter 0 | Sword protagonist | Axe apprentice | Healing NPC | Empty | One healing grape |
| Hunter chapter | Sword protagonist | Hunter (recruited) | Cleric apprentice | Axe apprentice | One antidote, one revive |
| Cleric chapter | Hunter protagonist | Cleric apprentice | Sword NPC | Empty | Two antidotes, one revive, one healing grape |
| Scholar chapter | Cleric protagonist | Scholar apprentice | Hunter backup | Sword NPC | One revive, two healing grapes |
| Chapter 1 boss | Spear protagonist | Scholar | Cleric | Dancer | One revive, two healing grapes |
| Chapter 2 boss | Scholar protagonist | Warrior | Cleric | Dancer | Two revives, three healing grapes, one full-party heal |
| True ending boss | Scholar protagonist | Warrior | Cleric | Dancer | Three revives, three healing grapes, one full-party heal |
Frequently asked questions
Is Octopath Traveler 0 a remake or a prequel?
Octopath Traveler 0 is a prequel. The story is set in an earlier chapter of Orsterra, and the protagonist is a new character rather than one of the eight travellers from the original game. The ring system is the new mechanic that ties the prequel to the wider series.
Do I need to play the earlier Octopath Traveler games to follow this walkthrough?
No. The walkthrough is written for a first-time player who has not played any earlier entry in the series. The earlier games share a setting and a visual style, but the combat, job, and town systems in Octopath Traveler 0 are designed to be learned from scratch.
Can I recruit all eight pathbearers in one playthrough?
Yes. The walkthrough’s chapter order recruits all eight starting pathbearers in the first half of the game, and the late-game content adds two more. The total is ten pathbearers across the full run, all of them recruitable on a single save.
What is the recommended level for the chapter 2 boss?
The recommended level range for the chapter 2 boss is roughly 28 to 32 on a first playthrough, depending on the party composition. The walkthrough’s table above lists the recommended party for that fight, and the party is tuned to a level 30 average.
Does the walkthrough work on the PC version as well as the mobile version?
Yes. The chapter order, the boss weaknesses, and the town upgrade path are the same on both versions. The only platform-specific difference is the input method for the librarian’s puzzle in the Scholar chapter, which is mouse-driven on PC and touch-driven on mobile.
What happens if I pick the wrong project in chapter 1?
Nothing irreversible. The other projects unlock within a few chapters regardless of which one you fund first, and the only difference is the order in which the next four pathbearer chapters become available. The walkthrough recommends the road project for the time saved on fast travel, but any project is a valid choice.
Are the pathbearer rings reusable after chapter 2?
Yes. The ring you equip in the tavern in chapter 2 is returned after the story-critical object is sealed, and the ring’s passive bonus continues to apply for the rest of the game. The walkthrough’s choice of the Hunter’s ring is based on the Hunter’s late-game passive, not on a one-time use.
How long is a full playthrough of Octopath Traveler 0?
A first playthrough that follows the walkthrough’s chapter order and clears the optional requests takes around 35 to 45 hours. A focused playthrough that skips the optional requests takes around 25 to 30 hours. A completionist playthrough that clears every side dungeon and every true ending flag takes closer to 60 hours.
Is there a New Game Plus mode?
Yes. New Game Plus unlocks after the true ending chapter and carries over the protagonist’s level, job unlocks, and a small number of materials. The walkthrough’s chapter order still applies in New Game Plus, but the recommended level for each chapter is shifted up by five to seven levels.
Where can I check the patch notes for the current version?
Patch notes are posted on the publisher’s official site and in the in-game news section. The walkthrough’s chapter order has been stable across the first two patches, and the only confirmed change in the most recent patch is the chapter 2 boss’s phase 2 immunity list, which is documented in the patch notes.


Leave a Reply